Getting Started guide
Let's create a simple workflow to process an order
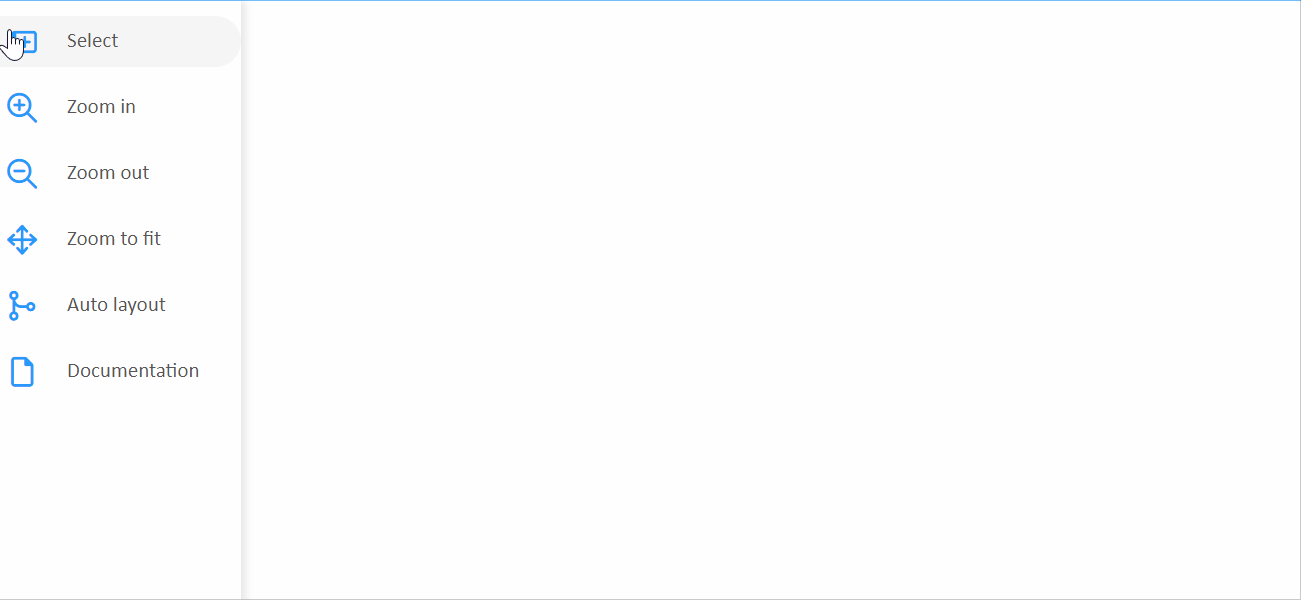
Step:1 Drag and drop nodes from the left-side tool panel onto the workspace.
Step:2 Edit the name and description of the nodes inline as below
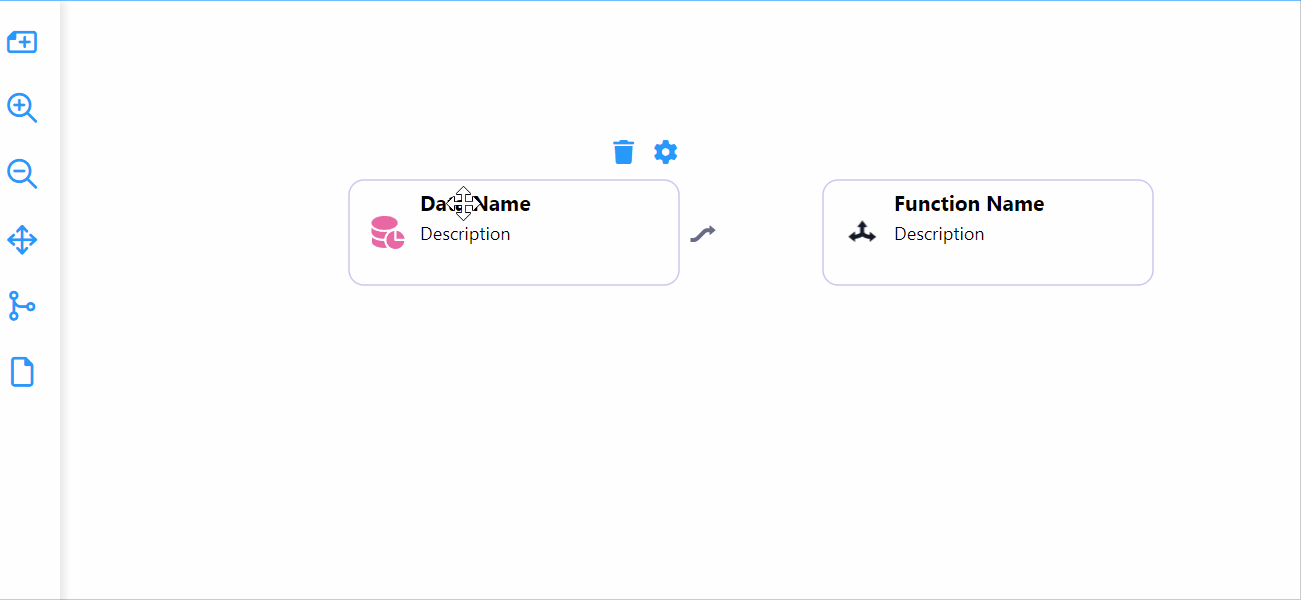
Step:3 Connect the nodes to each other

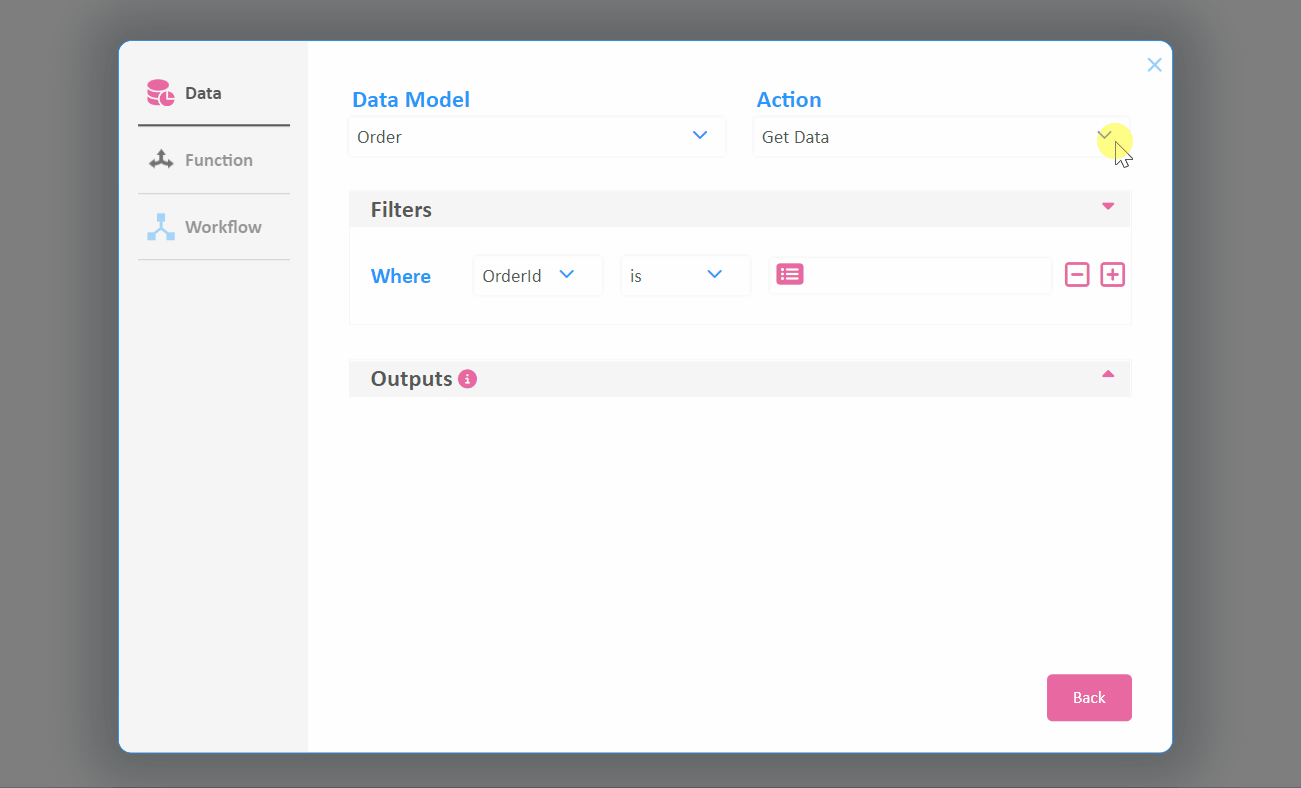
Step:4 Let's configure the first node. Select the first node and click the cog icon.

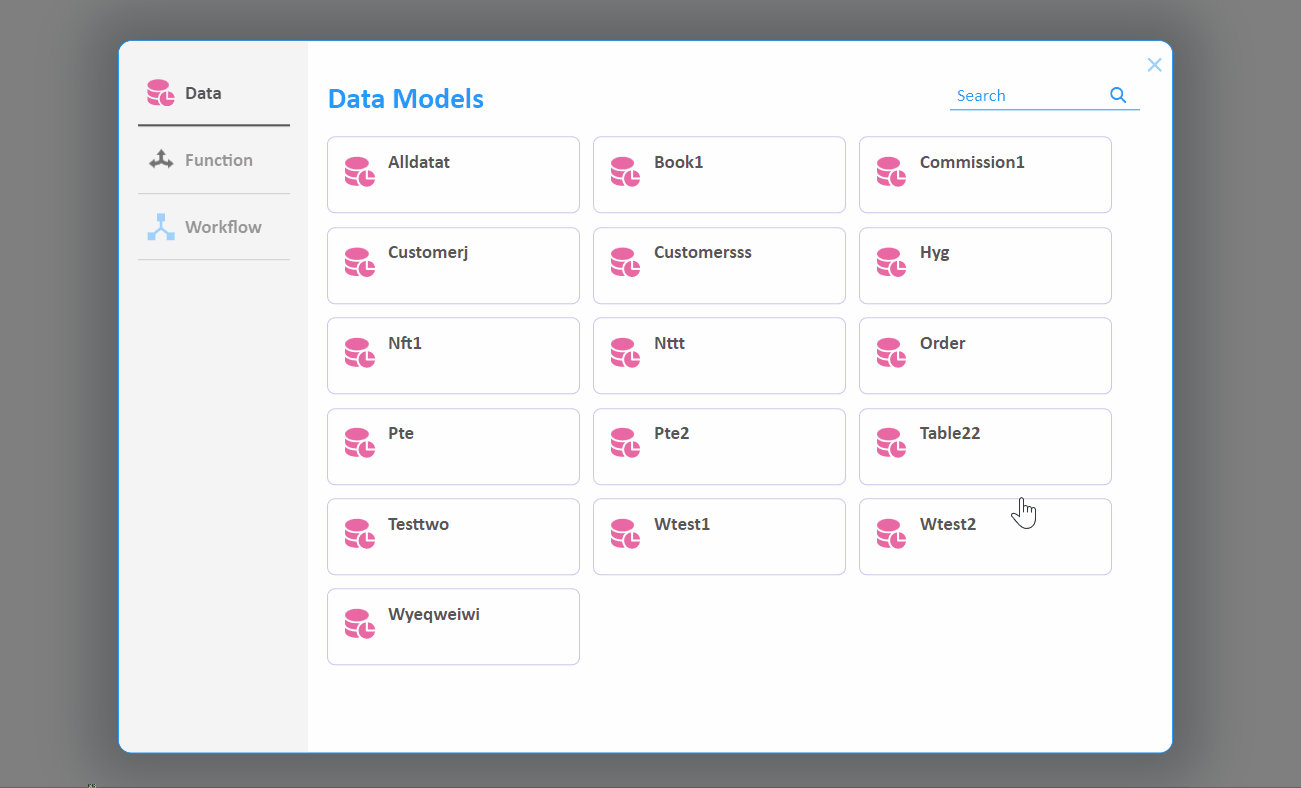
Step:5 In the pop-up model, you can see a list of models created from the Data Model Visualizer. Select the Order model from the interface. If no models are listed, [click here](https://app..platform.creatingly.com/dmv) to create one.
Step:6 Update Action to 'Create Record'. Optionally, enter any values for the properties and close the popup window.
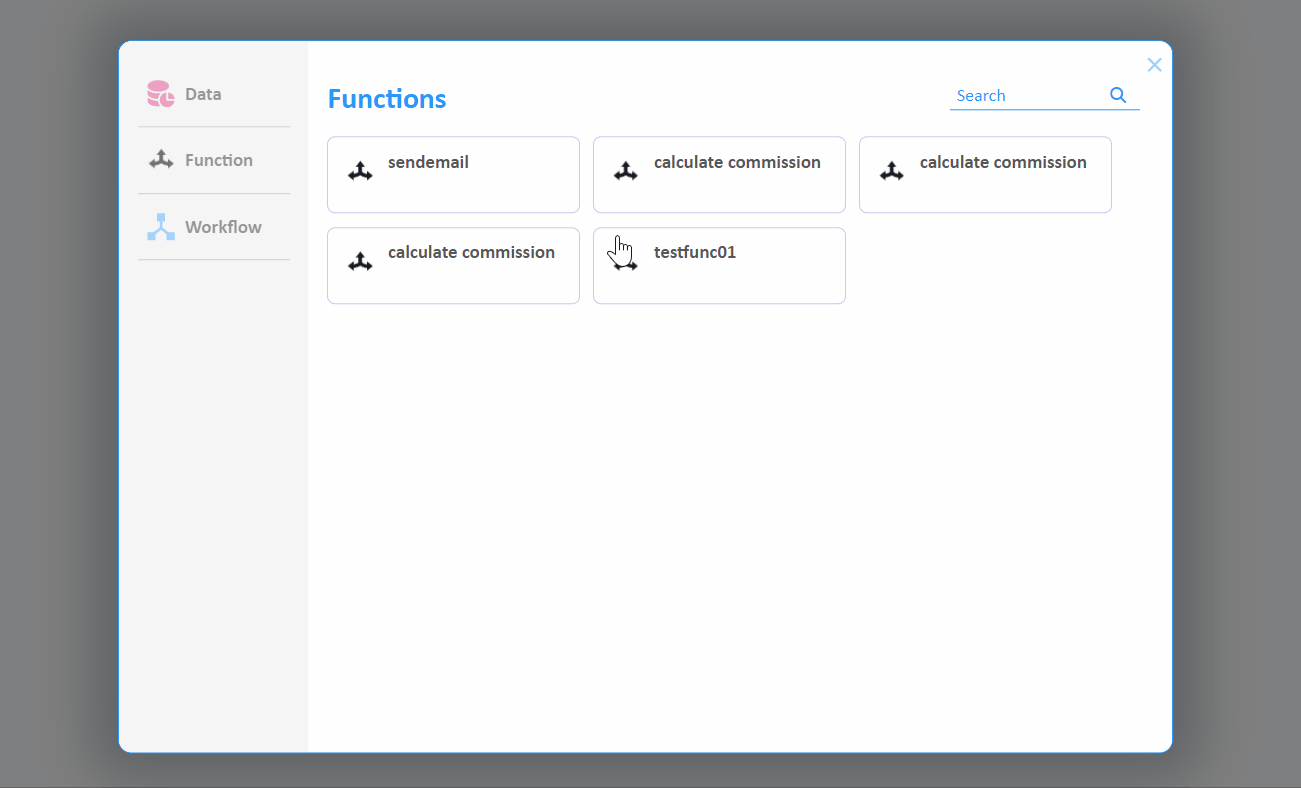
Step:7 Let's repeat the process and configure the second node now. Select the second node and click on the cog icon.

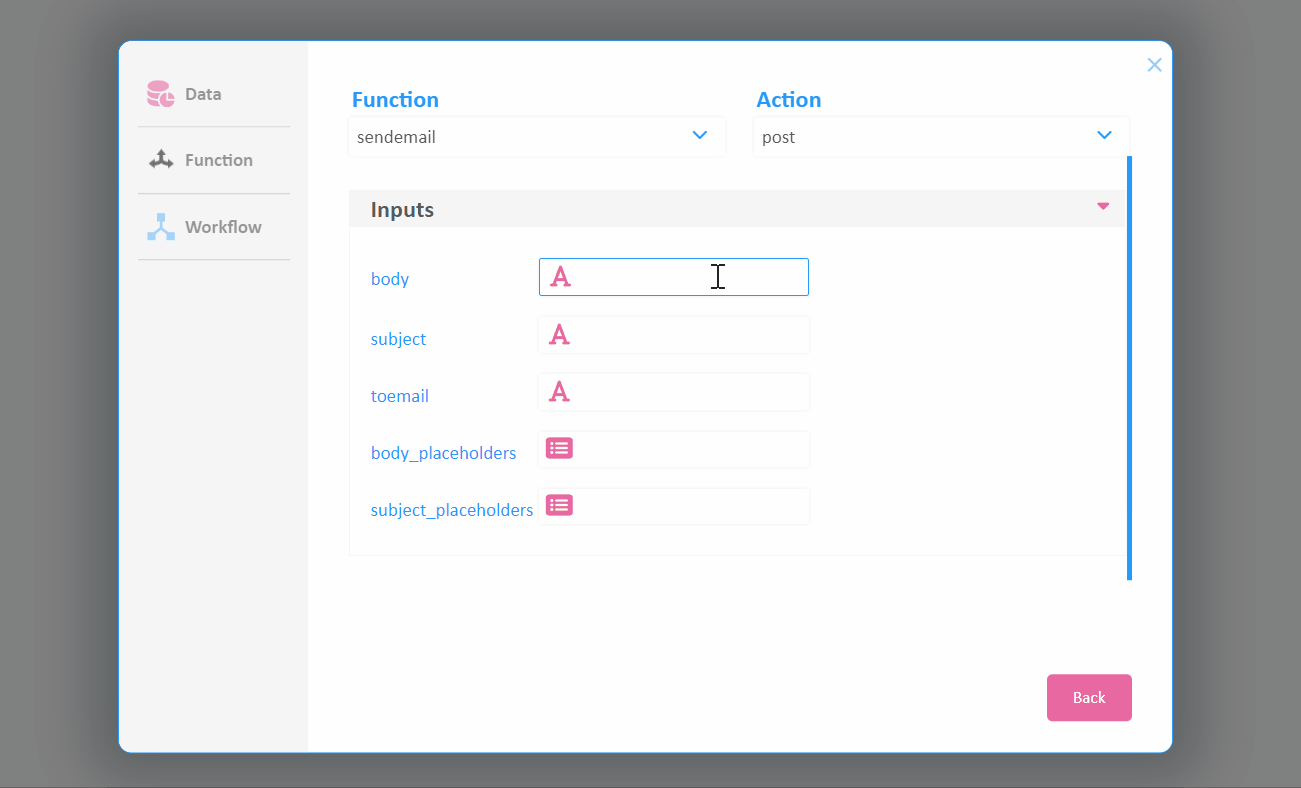
Step:8 In the pop-up model, you can see a list of functions created from the Function Factory. Select the Send Email option from the interface. If no functions are listed, [click here](https://app..platform.creatingly.com/ef) to create one.
Step:9 Map the body property to the OrderId from the previous block so the inventory team can pull the details and verify. Optionally, enter any values of the properties and close the popup window.
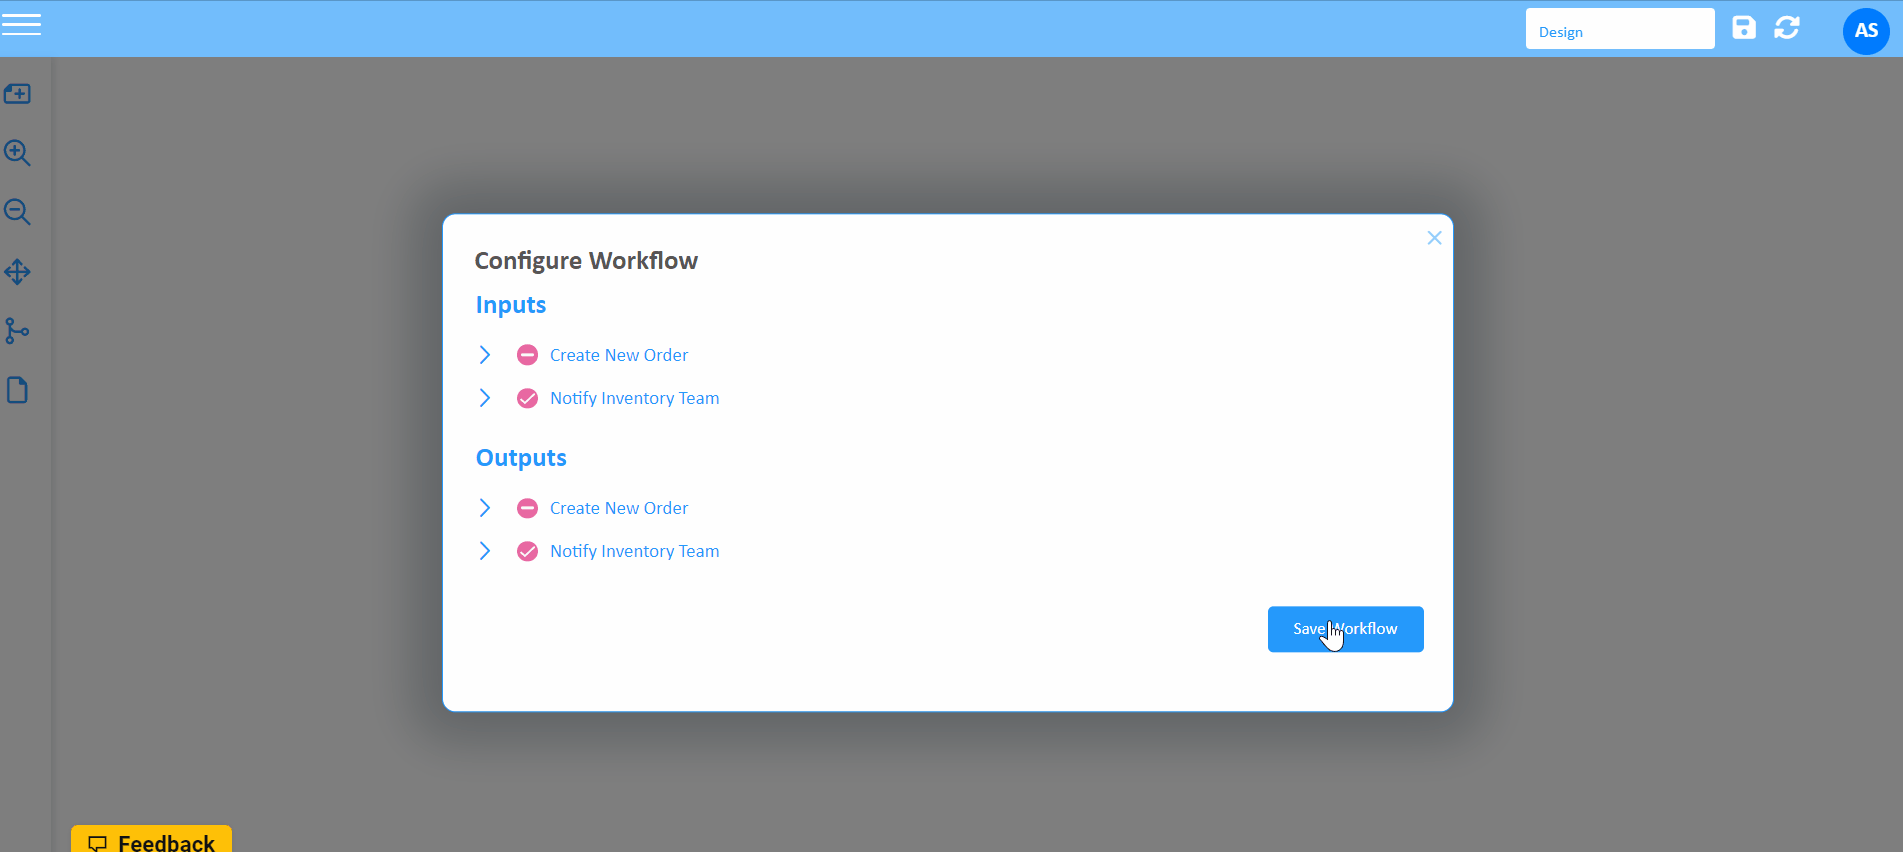
Step:10 Save: Click the save button from the top bar to configure inputs and outputs. By default, all unmapped properties of each node are automatically selected for inputs. You can untick the inputs and outputs according to your preference.
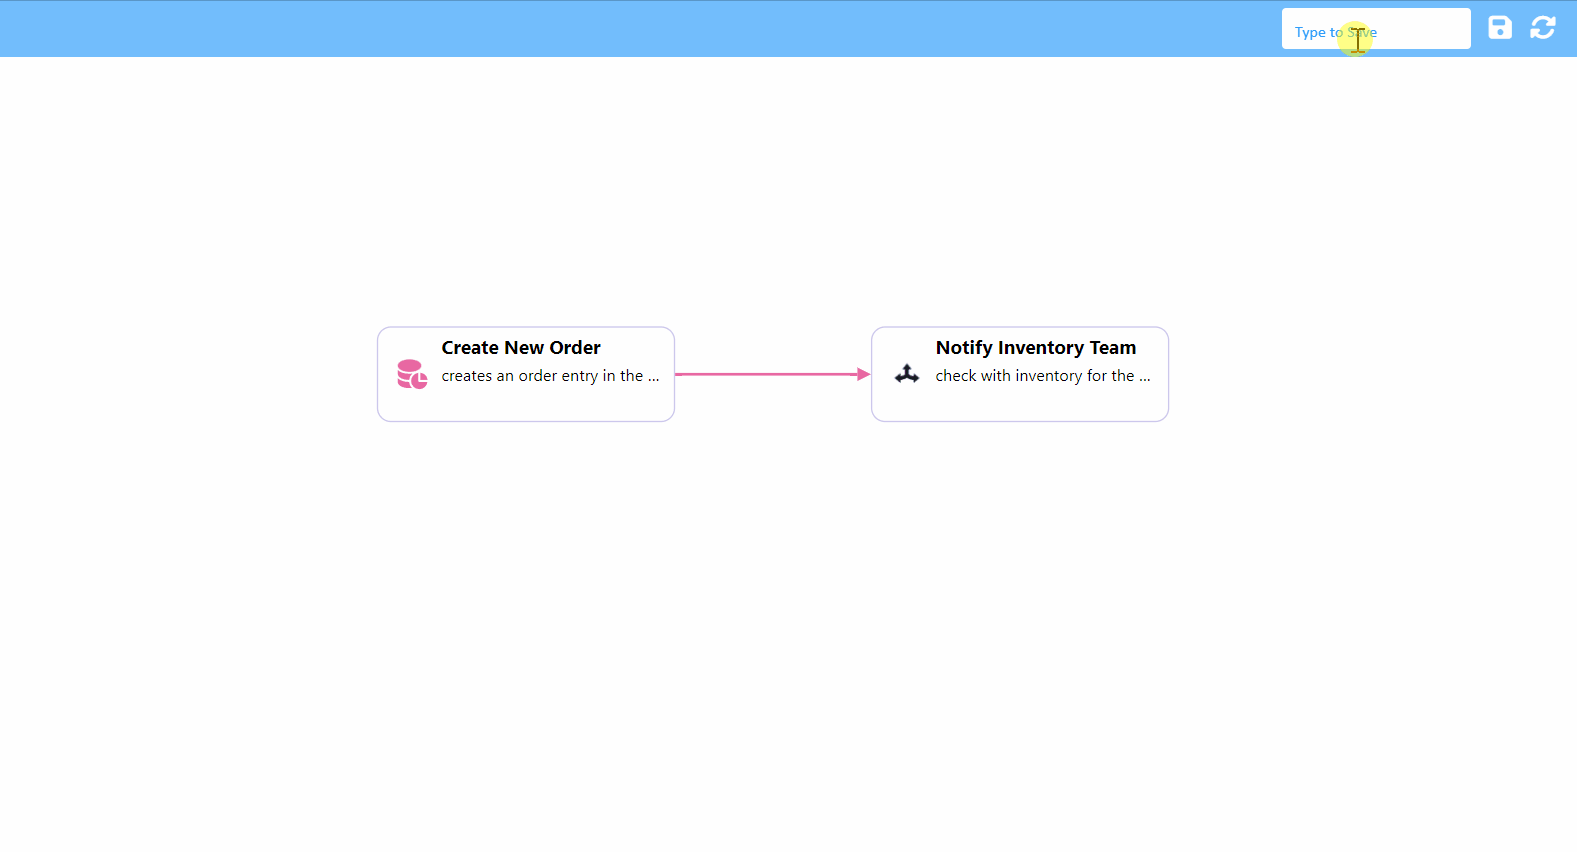
Step:11 Let's save the workflow. On clicking the save workflow button, the Creatingly backend system generates a code, which is then pushed to the Git repo maintained by Creatingly.